Cell bars with cups ready for grafting.
Whilst honeybees are perfectly able to raise new queens without the beekeepers intervention, there are many situations where a supply of young mated queens in an apiary is useful. The recommended action for several bee diseases and aggressive colonies is to requeen. Young queens also have a lower tendency to swarm. In addition, making up nucs for expansion or for sale is quicker with independently raised queens. Perhaps the most important reason to raise queens though is stock improvement. Breeding from your best colonies will, over time, produce bees well suited to your local area.
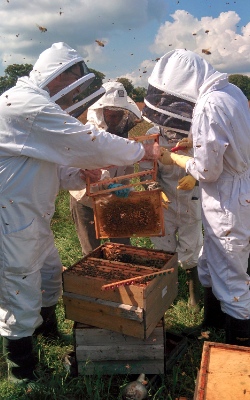
We recently spent a lovely weekend at the Basterfields’ honey farm in Devon learning the theory and practice of queen raising and stock improvement. This is one of several courses that Ken and Dan Basterfield, both holders of the National Diploma in Beekeeping, offer to beekeepers working towards BBKA assessments or those involved in teaching at local associations. Queen raising by its very nature takes time: suitable breeder queens must be chosen and colonies prepared to raise the new queens; cups have to be conditioned for a day before grafting; after grafting it takes a day or so before acceptance by the colony can been seen; a few more days are needed before the cells are sealed; and the cells shouldn’t be moved into small mating nucs until a couple of days before emergence is expected, around 11-12 days after grafting. The process isn’t complete until the queen is mated (requiring a suitable drone population), marked, and clipped if required. To cover the process, without the course becoming reliant on improvisation, requires a bit of Blue Peter “here’s one I made earlier”. Thanks to their meticulous preparation the whole process was compressed into two days with us all able to graft a dozen larvae, asses our success rate, make up mating nucs with ripe queen cells and finally practice clipping, marking and caging.
The course is split between classroom activities, practical sessions in the apiary and lively discussions over coffee and cake. The bees can raise queens from a wide range of larvae ages, however, the quality of the resultant queens, particularly their potential laying rate is influenced by the age of the chosen larvae.

Bee larvae of various ages.
In the image above, the larva second from right on the bottom row is around 1-2 days old and suitable to graft from. Lying in the bottom of the cell, the larvae should be about a fifth to a quarter of the (5.3mm) working cell width.

Young larvae transferred into practice cups.
After experimenting with several different grafting tools (a 000 paintbrush was my preferred tool) larvae of the right age were placed into cups. The process was pretty straightforward – however, this was sitting at a bench, in the classroom. How easy would this be in the apiary, peering through the veil’s mesh?
Working outside we had to be quick, as the young larvae can be damaged by exposure to UV light and are susceptible to drying out. The acceptance rate is also very dependent on the state of the colony. One word of advice was not to give up if a whole bunch of grafts are rejected but to try again, and again – the colony needs to be in the right condition to raise queens. I was very pleased to see half my grafts accepted.

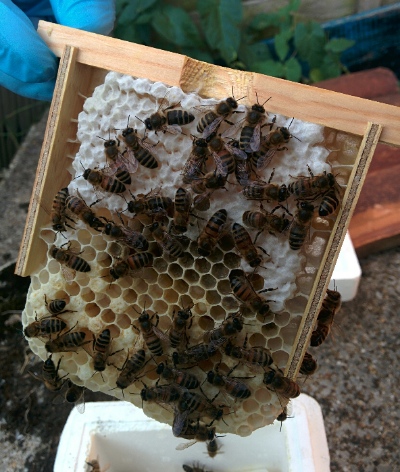
Successful grafts accepted by the colony.
Dan had been grafting the week before, not only to demonstrate that it’s possible but also to give us the experience of stocking mating Apideas. These small mating nucs require around 300 bees – a teacup full – a good chunk of bakers’ fondant and a ripe queen cell. Bees from a well-stocked colony are sprayed lightly with water and shaken from frames into a box. From there, they are scooped into upturned Apideas before a queen cell is added through the cut out hole in the crownboard. The mating nucs are kept in a cool, dark shed, with a little water sprayed onto their ventilation grill for three days. During this period, the virgin queens will emerge; ready for mating when the nucs are taken out.
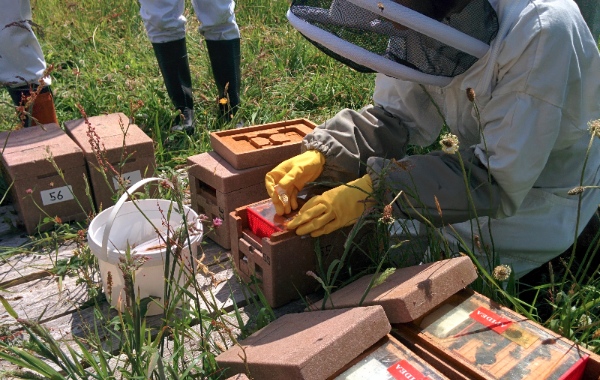
Adding queen cells to recently stocked apideas.
Of course it’s possible (and recommended!) to read the books and there’s never been so much material available on-line. However, there’s no substitute for spending a couple of days with two highly experienced beekeepers keen to share their knowledge. Beyond the direct syllabus of the course, as beekeepers with fewer than ten hives it was also fascinating for us to see how an operation of several hundred hives is managed, the honey extraction and bottling equipment, the workshops, even the bespoke equipment for moving their hives.
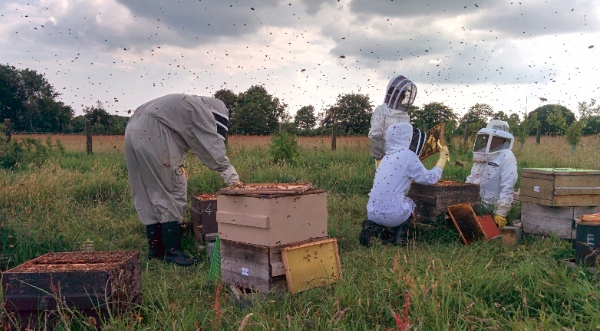
Inspecting colonies for suitable brood to graft from.
Finally, we thought we had better put this into practice in our own apiary. A queenless hive for cell raising was obtained conveniently by removing a queen who disappointingly had started laying drones. A queenless hive is not required but does improve the chances of graft acceptance, as the bees have to be “in the mood” for queen raising. After a couple of days for the bees to wax the new plastic cups, Erica grafted 10 young larvae from another colony into the cups on Thu 19th June. Three days later (22nd), we checked them to find an encouraging success rate of 7 out of 10 cups extended into long queen cells.

Erica’s first graft, seven out of ten accepted.
On Fri 27th, one was left in the queenless hive, two of the older ones were removed, and four others went into mating nucs with some young worker bees and fondant. They spent three days in the dark garage as recommended and are now (Tue 1st July) enjoying the sun in the garden at home. Check back in a few weeks for an update on whether our new queens manage to mate successfully and graduate into a full size colony!
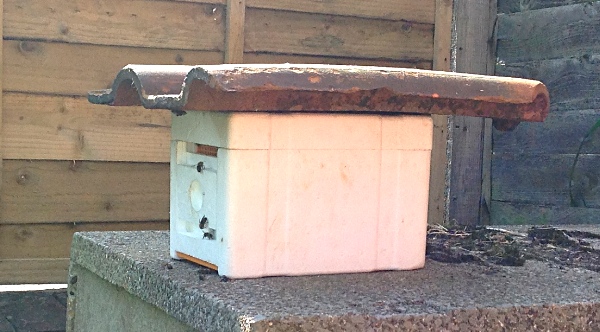
One of four small mating hives.
UPDATE
On the sunny afternoon of Sunday 6th July we spent a couple of hours watching the mating nucs. To our great satisfaction we saw three of the new queens leaving the nucs and taking to the wing. They flew around and around in ever widening circles gaining height, occasionally coming back to the nuc. We didn’t look inside, remaining fondant was estimated by weight.
On Sunday 13th all four were checked, the queens were seen but none had eggs. Checking back on Thursday 17th July, all four had eggs, but no larvae yet. We can now build up the following table:
| Thu 19th June |
Grafted (4-5 day old larvae). |
| Fri 27th June |
Sealed queen cells moved to mating nucs, left in dark for 3 days. |
| Mon 30th June – Tue 1st July |
Expected emergence based on 16 day rule. |
| Sun 6th July |
Queens seen flying. |
| Sun 13th July |
No eggs seen. |
| Thu 17th July (early morning) |
Eggs in all four, no larvae. |
From the final row in the table we can determine the queens all started laying between 14th and 16th of July so just over two weeks from emergence.
One other point, in addition to the four cells moved to the mating nucs, one was left in the queenless colony used to raise them. Checking on Monday 21st July we found three frames with brood, including some sealed! Given that it takes 8 days from egg to sealing, the queen must have been laying from no later than 13th July, slightly earlier than the four in the mating nucs.
Frame from a mating nuc with sealed worker brood.


")


