Category Archives: Beekeeping

Raising Queen Bees

Queen raising

Cell bars with cups ready for grafting.

Whilst honeybees are perfectly able to raise new queens without the beekeepers intervention, there are many situations where a supply of young mated queens in an apiary is useful. The recommended action for several bee diseases and aggressive colonies is to requeen. Young queens also have a lower tendency to swarm. In addition, making up nucs for expansion or for sale is quicker with independently raised queens. Perhaps the most important reason to raise queens though is stock improvement. Breeding from your best colonies will, over time, produce bees well suited to your local area.

We recently spent a lovely weekend at the Basterfields’ honey farm in Devon learning the theory and practice of queen raising and stock improvement. This is one of several courses that Ken and Dan Basterfield, both holders of the National Diploma in Beekeeping, offer to beekeepers working towards BBKA assessments or those involved in teaching at local associations. Queen raising by its very nature takes time: suitable breeder queens must be chosen and colonies prepared to raise the new queens; cups have to be conditioned for a day before grafting; after grafting it takes a day or so before acceptance by the colony can been seen; a few more days are needed before the cells are sealed; and the cells shouldn’t be moved into small mating nucs until a couple of days before emergence is expected, around 11-12 days after grafting. The process isn’t complete until the queen is mated (requiring a suitable drone population), marked, and clipped if required. To cover the process, without the course becoming reliant on improvisation, requires a bit of Blue Peter “here’s one I made earlier”. Thanks to their meticulous preparation the whole process was compressed into two days with us all able to graft a dozen larvae, asses our success rate, make up mating nucs with ripe queen cells and finally practice clipping, marking and caging.

The course is split between classroom activities, practical sessions in the apiary and lively discussions over coffee and cake. The bees can raise queens from a wide range of larvae ages, however, the quality of the resultant queens, particularly their potential laying rate is influenced by the age of the chosen larvae.

Bee larvae

Bee larvae of various ages.


In the image above, the larva second from right on the bottom row is around 1-2 days old and suitable to graft from. Lying in the bottom of the cell, the larvae should be about a fifth to a quarter of the (5.3mm) working cell width.
Queen cups

Young larvae transferred into practice cups.


After experimenting with several different grafting tools (a 000 paintbrush was my preferred tool) larvae of the right age were placed into cups. The process was pretty straightforward – however, this was sitting at a bench, in the classroom. How easy would this be in the apiary, peering through the veil’s mesh?

Working outside we had to be quick, as the young larvae can be damaged by exposure to UV light and are susceptible to drying out. The acceptance rate is also very dependent on the state of the colony. One word of advice was not to give up if a whole bunch of grafts are rejected but to try again, and again – the colony needs to be in the right condition to raise queens. I was very pleased to see half my grafts accepted.

Accepted grafts

Successful grafts accepted by the colony.


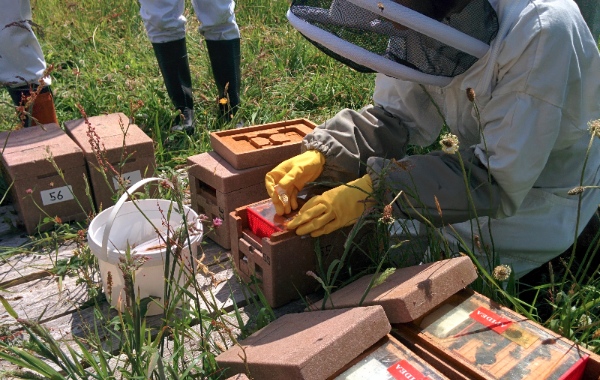
Dan had been grafting the week before, not only to demonstrate that it’s possible but also to give us the experience of stocking mating Apideas. These small mating nucs require around 300 bees – a teacup full – a good chunk of bakers’ fondant and a ripe queen cell. Bees from a well-stocked colony are sprayed lightly with water and shaken from frames into a box. From there, they are scooped into upturned Apideas before a queen cell is added through the cut out hole in the crownboard. The mating nucs are kept in a cool, dark shed, with a little water sprayed onto their ventilation grill for three days. During this period, the virgin queens will emerge; ready for mating when the nucs are taken out.
Apideas

Adding queen cells to recently stocked apideas.


Of course it’s possible (and recommended!) to read the books and there’s never been so much material available on-line. However, there’s no substitute for spending a couple of days with two highly experienced beekeepers keen to share their knowledge. Beyond the direct syllabus of the course, as beekeepers with fewer than ten hives it was also fascinating for us to see how an operation of several hundred hives is managed, the honey extraction and bottling equipment, the workshops, even the bespoke equipment for moving their hives.
Beekeepers

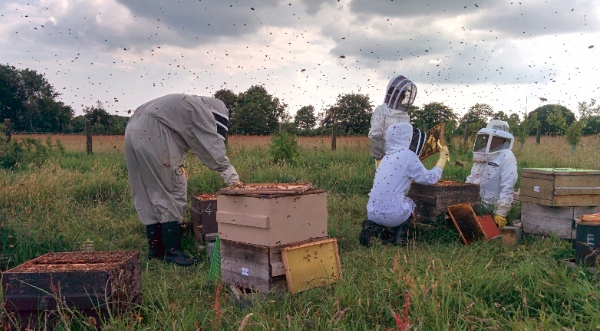
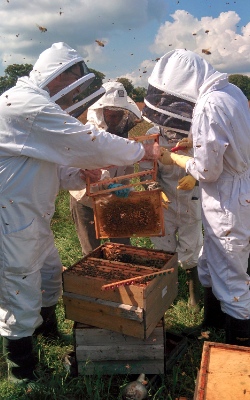
Inspecting colonies for suitable brood to graft from.


Finally, we thought we had better put this into practice in our own apiary. A queenless hive for cell raising was obtained conveniently by removing a queen who disappointingly had started laying drones. A queenless hive is not required but does improve the chances of graft acceptance, as the bees have to be “in the mood” for queen raising. After a couple of days for the bees to wax the new plastic cups, Erica grafted 10 young larvae from another colony into the cups on Thu 19th June. Three days later (22nd), we checked them to find an encouraging success rate of 7 out of 10 cups extended into long queen cells.
Queen cells

Erica’s first graft, seven out of ten accepted.


On Fri 27th, one was left in the queenless hive, two of the older ones were removed, and four others went into mating nucs with some young worker bees and fondant. They spent three days in the dark garage as recommended and are now (Tue 1st July) enjoying the sun in the garden at home. Check back in a few weeks for an update on whether our new queens manage to mate successfully and graduate into a full size colony!
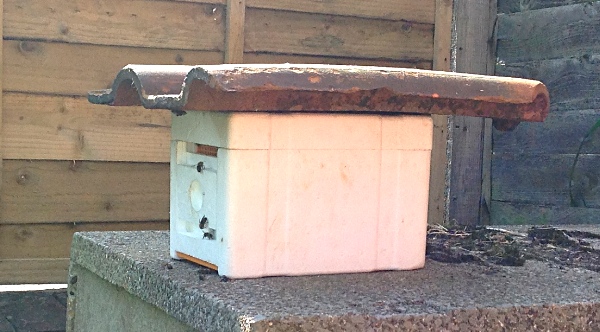
Mating nuc

One of four small mating hives.

UPDATE

On the sunny afternoon of Sunday 6th July we spent a couple of hours watching the mating nucs. To our great satisfaction we saw three of the new queens leaving the nucs and taking to the wing. They flew around and around in ever widening circles gaining height, occasionally coming back to the nuc. We didn’t look inside, remaining fondant was estimated by weight.

On Sunday 13th all four were checked, the queens were seen but none had eggs. Checking back on Thursday 17th July, all four had eggs, but no larvae yet. We can now build up the following table:

Thu 19th June Grafted (4-5 day old larvae).
Fri 27th June Sealed queen cells moved to mating nucs, left in dark for 3 days.
Mon 30th June – Tue 1st July Expected emergence based on 16 day rule.
Sun 6th July Queens seen flying.
Sun 13th July No eggs seen.
Thu 17th July (early morning) Eggs in all four, no larvae.

From the final row in the table we can determine the queens all started laying between 14th and 16th of July so just over two weeks from emergence.

One other point, in addition to the four cells moved to the mating nucs, one was left in the queenless colony used to raise them. Checking on Monday 21st July we found three frames with brood, including some sealed! Given that it takes 8 days from egg to sealing, the queen must have been laying from no later than 13th July, slightly earlier than the four in the mating nucs.
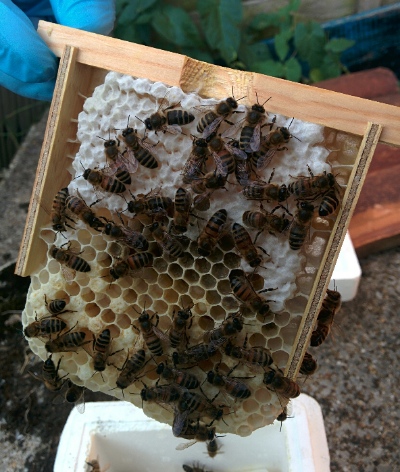
Mating nuc frame

Frame from a mating nuc with sealed worker brood.

Making Mead

Last week our local beekeeping association ran a mead workshop. We’d never made mead before and only tasted it a couple of times. Mead, or honey wine, is an ancient fermented drink made from fermenting honey and water. It uses quite a lot of honey, so typically beekeepers use honey that might otherwise go to waste, such as the cappings. Cappings are the thin layer of honey soaked wax that’s cut from the surface of the honey frames during extraction.

Mead or Honey Wine

Mead fermenting in demijohn.

The process we followed was straightforward. Into a demijohn we put around 3 litres of water (mostly filtered and boiled rainwater, but topped up with some tap water, not ideal). We then added ~100ml of ‘starter’, a yeast solution that had been pre-prepared for us, ~100ml of lemon juice and approximately 1 kg of honey. The starter was Lalvin D-47 yeast, water, honey and lemon juice prepared a few days earlier. The water wasn’t quite warm enough for the honey to dissolve, it just sat in the bottom of the demijohn.

Once home we sat the demijohn in a sink of warm water and gave it a stir, this was enough for the honey to dissolve. On went the airlock and for two days nothing much happened. On the third day, the yeast had got into its stride with CO2 being produced and bubbling through the airlock every 30 seconds or so.

Apparently we should now wait several months until fermentation has completed before racking into smaller bottles and leaving to age. Watch this space.


When is a mead not a mead?

Whilst looking around the Internet for mead, the first things Google found for me were Cornish Mead Wine from the Cornish Mead Company and Lindisfarne Mead. Neither of these products sound like mead to me, as they are based on a fermented grape base, making these products pyments:

Pyment in modern usage refers to a fermented beverage made with grapes as well as honey; it can be considered as a grape mead or a honeyed wine, depending on the relative amount of fermentables from each source. Red or white wine grapes may be used.
http://www.homebrewtalk.com/wiki/index.php/Pyment

My understanding of mead is that only honey, water and yeast are traditionally used. Maybe ‘mead’ is just an easier term for marketing these pyments as few people know what pyment is?

Capturing a Swarm of Bees

We’ve only been ‘beekeepers’ for a few months so imagine our surprise when we get a call from someone at our local association informing us of a reported swarm and inviting us to go and collect it! Sure, we’ve read the books, watched the videos and have the equipment and insurance but neither of us has actually taken any part in a swarm capture before. So, of course we said yes!

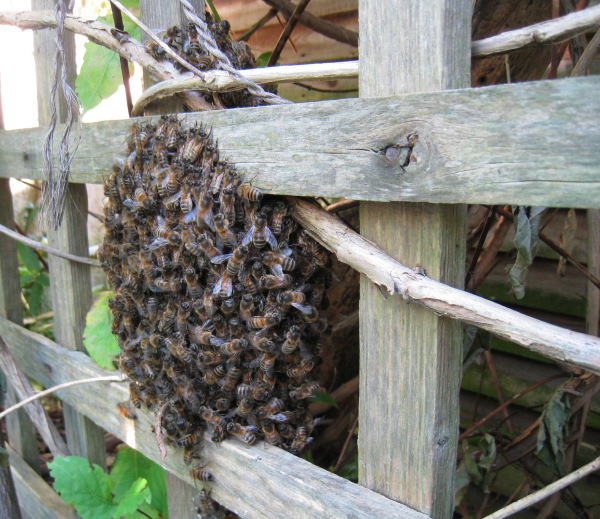
Here’s the swarm as we found it on the morning of Sunday 22nd July 2012:

Swarm

Small swarm of bees

According to Wikipedia, there’s an old English poem that goes:

A swarm of bees in May is worth a load of hay;
A swarm of bees in June is worth a silver spoon;
A swarm of bees in July isn’t worth a fly.

(Or possibly for the last line, “A swarm of bees in July, let them fly.“)

On top of that, this is by all accounts a small swarm. But this is the swarm in front of us and at the very least we owe it to the lady whose garden it’s in to remove it. Fortunately the bees were only about a foot off the ground, with the only difficulties being the cramped conditions behind the greenhouse and the fact they had settled through a trellis fence. With a little water spray to calm them it wasn’t too hard to sweep the majority off the fence and into the box. I had already made a another nuc (similar in design to this one I described earlier) so they went straight in there with the crown board leaving a small gap.

Swarm

Most of the bees in the nuc

Within seconds it was clear that we’d captured the queen as many bees positioned themselves by the entrance and started fanning pheromones from the Nasonov gland on their abdomens.

Swarm

Within seconds bees are fanning at the entrance

It was clear that not all the bees would enter the nuc until dusk so we explained the situation and said our good-byes until the evening. Returning at dusk all was quiet and every single bee seemed to be in the nuc, at least there were none on the fence or anywhere else we could see. Result! Without further ado we sealed the box and drove them home.

Only time will tell whether a swarm this size, at this time of year, most likely with a virgin queen will be able to build itself up in time for winter, especially given the variable weather this year. However, this has been another interesting experience on our beekeeping journey!

A week in the life of a frame of bees

Throughout the summer we are inspecting the bees as close to weekly as other commitments allow. On each inspection we take a quick photo of each frame. This allows us to study the frame in detail in our own time on the computer.

Two recent visits took place on Wednesday 4th July and Thursday 12th July. The swarm was hived on 16th of June so these inspections are +19 days and +27 days respectively. Since it takes 21 days from the egg being laid for a worker bee to emerge, on the 4th July all we had was lots of sealed brood. However, by the inspection on the 12th, it was all change!

The photos below show both sides of the same frame on each inspection. Click the images for high-resolution.

Frame of bees

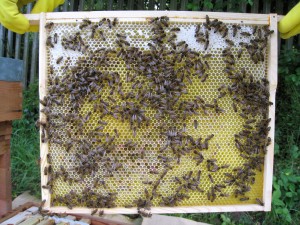
Front of the frame, sealed brood on the left, recently emerged on the right.


Frame of bees

Back of the same frame.

By the 12th July much of the brood has emerged, increasing the colony’s size for the first time since the swarm was caught. Encouragingly, the recently vacated cells had all been cleaned out and recharged with new eggs! Restart the counter – these cells should be emerging sometime around the 1st August!

The wild comb on the bottom of the frame is the result of using a normal deep national frame in a 14×12 brood box. We have three such frames in the box currently which we’re planning to leave for the time being.

Bee inspection, with photos

First a little history about these bees. The swarm was caught near Bradford-on-Avon on the 15th June and they went in our hive on Saturday 16th June. We just transferred them on the three National sized brood frames (foundation) they came on, filling the rest of the brood box with eight 14×12 frames of foundation. The attached photos are from the inspection on 28th June, 12 days later. In each case, click for a high resolution photo.

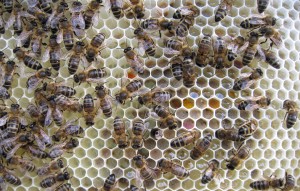
This is the best 14×12 frame. It was clean foundation 12 days ago. Now it has capped stores at the top, larvae in the middle and pollen, including some amazing pink stuff, towards the bottom.

Bees on a 14x12 National frame

Bees on a 14x12 National frame

The first sealed brood, which means new worker bees in ~12 days. Cells are sealed on day 9 after laying, suggesting our queen was probably already mated when she swarmed. Also note the fat larvae next to the capped cells, they’re next!

First sealed brood

First sealed brood

I love this photo, so sharp and amazing pollen.

Pollen

Pollen

Not the sharpest photo – but does include the queen, Queen Antoinette. The next one will be Boadicea, then Cleopatra and so on. Can you spot her?

The queen bee

The Queen, Antoinette

Photos taken by Wyc as I inspected the frames.

Building a Nucleus Bee Hive

Nuc hive

The finished 14x12 nuc hive

A nucleus hive is a small bee hive. Where a conventional hive holds 10-12 frames in the broodbox and can be expanded upwards by adding supers for honey storage, a nucleus or ‘nuc’ hive only holds 3-6 frames of brood. They are typically used for housing small colonies that result from a captured swarm or a split from a large colony. They are handy to have around, as the late Dave Cushman wrote:

Many beekeeping problems can be solved by either putting something into a nucleus or taking it out.

Whilst we bought our 14″x12″ National hive, I decided to have a go at making a nuc. Since we’re using extra deep brood frames, I’m building the nuc to take these. Browsing the web with this in mind a few weeks ago I came across Martin Adams’ album on Photobucket. Home made nucs and plans! The Internet really is a remarkable thing, we’ll miss it when it’s gone! I’ve copied the plans below in case the Photobucket site is unavailable in the future.

With cutting list in hand I bought a single 8′ by 4′ sheet of 12mm external plywood from B&Q. They helpfully made a few appropriate cuts so I could get it in the car. There’s enough material for two, with a good bit of spare. You can get five out of two sheets, but I figured that might be too much of a good thing! With the cutting done, it was simply glued and screwed together with powerdrive (deep cut thread) screws. Click the thumbnails to enlarge:

Materials

Half a hive

Edges glued and screwed

Frames in nuc

Holds 6 frames

Bee space

Perfect bee space

Hive vent

Mesh over vent

There’s a crownboard not shown in the photos with a hole for a feeder. The roof space is 100mm, enough for the 4 pint rapid feeder. I’ve painted the hive with an exterior grade woodstain, five coats in all, to provide a degree of weather proofing. The nuc is currently out in the garden, with some frames of foundation and a few drops of lemongrass oil. The hope being that a nearby swarm might move in!

In all the nuc cost just under £20 to build.

Nuc hive

The finished hive before five layers of woodstain.

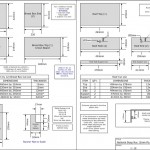
Plans from Martin Adams, click to enlarge:

National nuc hive

14"x12" National

Nuc hive

Regular National

The bees have arrived!

On Friday evening our bees arrived. Well, what actually happened was someone from our local beekeeping association caught a swarm and our name had reached the top of the swarm list. They arrived in a 4-frame national nuc, buzzing loudly to an ear pressed up against the mesh ventilation. It was getting late so we left them in the shed overnight before transferring them into the new hive on Saturday morning.

Our hive is a deep national, with 14″x12″ frames. Transferring the normal national brood frames over isn’t ideal as there’s a gap at the bottom where the bees are likely to draw natural comb. No matter. The bees went into the hive with a dusting of icing sugar to help control varroa.

Bees

New bees into their new home - hope they like it!

The weather wasn’t great over the weekend but we fed them with a 1:1 sugar solution. Initially from an upturned 1lb jar with small holes punched in the lid from which they took approximately half the jar on the first day, and half on the 2nd day. After that (once it had arrived!) we switched to a rapid feeder with two advantages; it holds 4 pints of solution so we don’t need to top it up every day or two and more bees can feed simultaneously. The weather seems to be improving a little and there is loads of blackberry in flower very close to the hive. All should be well.

The bees seem to have settled in well, as I write (Tuesday) they are starting their fourth day in the hive, there seems to be lots of foraging activity and they are all over the nearby blackberry this morning. We haven’t lifted the crownboard and disturbed the frames since installing them, and haven’t therefore spotted the queen. Will check at the weekend to see how they are getting on.