Category Archives: Food

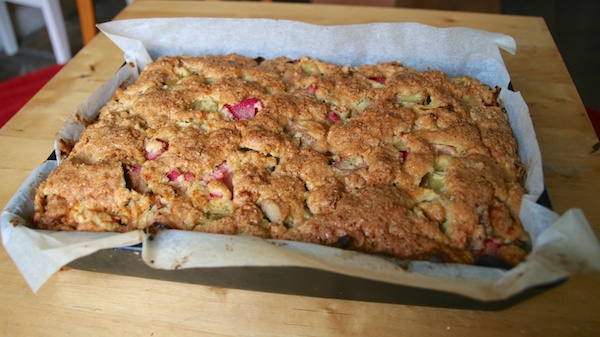
Rhubarb Cake

In May we always have an abundance of rhubarb. It’s a fantastic vegetable for crumbles, jam, cakes or just stewed with a bit of ice cream. We appreciate it even more because there isn’t much else from the garden at this time of year. Here’s a cake I bake a lot when there’s rhubarb about.

Rhubarb Cake

This is a double mixture cake, quantities below are good for a large loaf tin.

  • 18 oz fresh rhubarb
  • 12 oz self raising flour
  • 6 oz caster sugar
  • 6 oz butter
  • 3 eggs
  • Sprinkle of Demerara sugar
  • Pinch of salt

1. Preheat over to 180 ºC and line a large loaf tin with greaseproof paper.

2. Sieve flour and salt into large mixing bowl.

3. Add butter and rub in until you have breadcrumb texture.

4. Add sugar.

5. Cut rhubarb into chunks less than an inch long and add to bowl.

6. Crack the eggs into the bowl, break the yokes and stir the mixture.

7. Don’t be worried about how dry the mixture is at this stage, there’s a lot of water locked up in the rhubarb! Just mix it all together.

8. Transfer mixture into tin, firm it down and sprinkle with Demerara sugar.

9. Cook for about an hour or until it generally looks done! Leave to cool for at least 20 mins before turning out of tin.

Ciabatta

Ciabatta

First two loaves of ciabatta

Ciabatta’s wonderful, especially dipped in balsamic and olive oil. We had a go making some the other day with great success.

  • 375 g strong white bread flour
  • 125 g semolina, plus up to another 200 g for dusting
  • 5 g fast dried yeast
  • 10 g salt
  • 400 ml warm water
  • Olive oil

1. Mix the flour, semolina, yeast salt and water together in a large bowl, then add a good slug of oil. This will be a very wet dough, too wet for kneading. It needs mixing by hand or alternatively with the dough hook of a food mixer for 5 minutes.

2. Put the bowl in a plastic bag to ferment for 3 hours. Every half hour or so remove it from the bag, add a bit more olive oil, smooth it all over and fold the dough over itself a couple of times. Yes it’s very sticky at first but it gets easier.

3. We don’t have a baking stone or peel, we just sprinkle two baking sheets with a good covering of semolina.

4. Sprinkle the work surface with semolina and turn out the dough onto it. Separate into two equal lumps. Dust everything with semolina. Taking one lump at a time, flatten it and stretch it out into a rectangle. Roll this up into a cylinder four times as long as it is wide and place on the baking sheet to double in size.

5. Heat the oven to maximum.

6. Once risen, put them into the oven quickly, baking at maximum heat for 10 minutes before turning down to 200 ºC for another 15 minutes.

7. Remove from the oven, drizzle a little oil on top and allow to cool on a rack.

Making Mead

Last week our local beekeeping association ran a mead workshop. We’d never made mead before and only tasted it a couple of times. Mead, or honey wine, is an ancient fermented drink made from fermenting honey and water. It uses quite a lot of honey, so typically beekeepers use honey that might otherwise go to waste, such as the cappings. Cappings are the thin layer of honey soaked wax that’s cut from the surface of the honey frames during extraction.

Mead or Honey Wine

Mead fermenting in demijohn.

The process we followed was straightforward. Into a demijohn we put around 3 litres of water (mostly filtered and boiled rainwater, but topped up with some tap water, not ideal). We then added ~100ml of ‘starter’, a yeast solution that had been pre-prepared for us, ~100ml of lemon juice and approximately 1 kg of honey. The starter was Lalvin D-47 yeast, water, honey and lemon juice prepared a few days earlier. The water wasn’t quite warm enough for the honey to dissolve, it just sat in the bottom of the demijohn.

Once home we sat the demijohn in a sink of warm water and gave it a stir, this was enough for the honey to dissolve. On went the airlock and for two days nothing much happened. On the third day, the yeast had got into its stride with CO2 being produced and bubbling through the airlock every 30 seconds or so.

Apparently we should now wait several months until fermentation has completed before racking into smaller bottles and leaving to age. Watch this space.


When is a mead not a mead?

Whilst looking around the Internet for mead, the first things Google found for me were Cornish Mead Wine from the Cornish Mead Company and Lindisfarne Mead. Neither of these products sound like mead to me, as they are based on a fermented grape base, making these products pyments:

Pyment in modern usage refers to a fermented beverage made with grapes as well as honey; it can be considered as a grape mead or a honeyed wine, depending on the relative amount of fermentables from each source. Red or white wine grapes may be used.
http://www.homebrewtalk.com/wiki/index.php/Pyment

My understanding of mead is that only honey, water and yeast are traditionally used. Maybe ‘mead’ is just an easier term for marketing these pyments as few people know what pyment is?

Pumpkin Pie

We’ve had a lot of success growing pumpkins this year. 111 kg in total, 100% organic, and not those no-taste wannabe pumpkins the supermarkets sell for carving! Here’s the recipe for the pumpkin pies I’ve been making weekly for the last six weeks or so. It’s based on a 30 cm flan tin:

The Pastry

  • 165 g plain flour
  • 75 g butter
  • pinch of salt

The Filling

  • 145 g golden syrup (of maple syrup if you’re feeling posh)
  • 150 ml evaporated milk
  • 2 eggs
  • cinnamon, ginger, cloves and nutmeg to taste
  • ~1 kg of pumpkin
  • Sugar for sprinkling

1. Make the pastry in the usual way: rub butter into flour/salt, add very little water so it can be brought together with a cold knife. Then, in a plastic bag/cling-film and put it in the fridge to cool.
2. Roast the pumpkin in chunks with a little oil for around 30 minutes at 200 ºC.
3. Mix the syrup, evaporated milk, eggs, and spices all together, keeping a little egg back for brushing on the pastry.
4. Line the base of the tin with greaseproof paper and butter sides.
5. Roll out pasty, line tin, paint edge with egg and blind bake at 200 ºC for 8-10 minutes. Keep a little pastry back for the lattice.
6. Once pumpkin is soft, mash it into filling, leaving out the skins.
7. Add the filling to the tin and lay out the lattice on the top. Brush the top with egg and sprinkle with sugar.
8. Bake for around 30 minutes at 180 ºC

Pumpkin Pie

Pumpkin Pie

Apple Tree Grafting

Apple trees can’t be grown from seed. Well, the pip will grow but it will very likely produce a fairly unpalatable crab apple* and the tree will be large. When propagating apple trees we want to grow a particular variety; Bramley, Cox or Russet etc. and we want the tree to be a manageable size. The only way to grow a Cox is to clone an existing Cox – all Cox apple trees alive today are cones of the original (or clones of clones etc.). In order to clone the existing tree we take cuttings of scion wood in the winter when pruning the tree, typically first year growth of approximately pencil thickness. These ‘twigs’ are then grafted onto rootstocks in the early spring. The size of the eventual tree is determined by the choice of rootstock: a seedling rootstock will be a full sized apple tree but for most gardens or orchards, semi-dwarfing or even very small dwarfing rootstocks are preferred.

Applerootstock

Apple rootstocks

The seedling, or standard rootstock is a third larger again than M111/M25.

This spring I bought ten MM106 for £2 each. A couple of months earlier I had attended an apple tree pruning workshop where along with learning the basics of pruning I was able to collect some scion wood from both Bramley and Fiesta (also known as Red Pippin). I also took some scions from the Worcester Pearmain on our allotment. The dry scion wood was wrapped in plastic and kept in the fridge to keep it dormant until it was time to graft. The ten trees were grafted on the 25th March 2012.

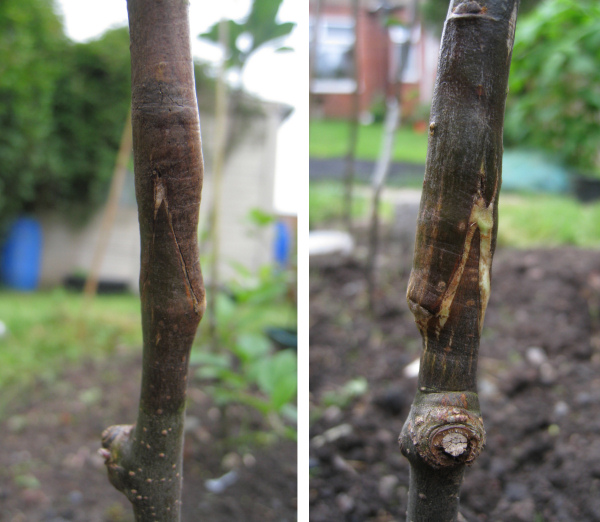
There are many ways to graft. I chose the ‘saddle graft’ as it seemed the simplest. An upwards pointing ‘V’ is cut into the rootstock and a matching hollow is cut into the scion so that it forms a tight fit. You can buy special grafting tape to wrap around the join but I used used strips of plastic carrier bag.

I’m writing this six months later on the 25th August having just removed the the plastic bindings (which in all cases stayed on tight). See below for the resulting grafts. Eight of the ten seem to have worked well, one didn’t take at all and one seems to have formed a good join but there are no leaves on the scion wood.

Grafted apple trees

10 apple trees.

Apple tree graft

Apple tree graft.

Apple tree graft

Apple tree graft.

*Unless you happen to be lucky. Erica’s great-grandfather (known as Grandpa Buxton) planted a pip from an apple he ate in the garden, and the resulting tree has produced many excellent cooking apples over the years. It was registered as a new variety and is now even available by mail order!

Food Dehydrator

We have an apple tree on our allotment, it’s a Worcester Pearmain (we think) and by late August we have more apples than we know what to do with! This variety don’t store well and after giving away a couple dozen we still have over 50 on the table. Drying seems like a good idea but the food dehydrators on the market cost around £50 for a small one (0.38 m2 drying area) to over £200 for a larger one (1.35 m2). With a bank holiday Monday to kill, we joined the crowds at the hardware store to see if we could knock something up ourselves.

We did skip a few bits of wood and if we’d planned this for more than 15 minutes could certainly have skipped all the wood. As it happened though we spent £6.90 on the wood.

Wood £6.90
Trays 7 x £1.75 = £12.25
Cable £1.80 (4 m)
Plug £0.64
Lamp holders 4 x £0.98 = £3.92
Switch £1.72
Bulbs £1.97 (4 x 60W)
Screws ~60 = 0.40

Also a little bit of wood glue and some foil and duct tape (say 50 pence).
The cardboard is of no cost and the fan (120 mm, 12 v) came from an old computer case (these can be bought for £3 from good computer shops).

Total cost = £29.90

Call it £30.50 or £34 once we’ve added the 8th and 9th racks there’s room for. The shop only had seven in stock.

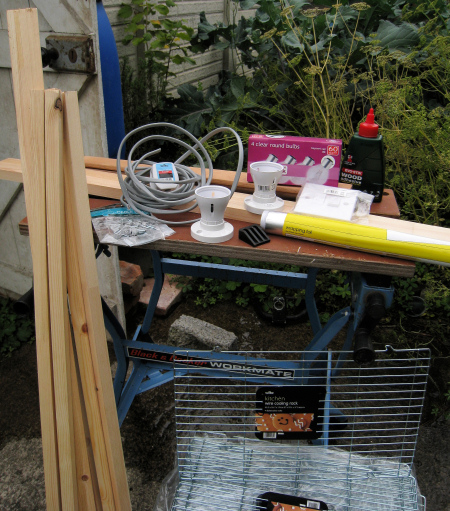
Materials

The materials for the dehydrator.

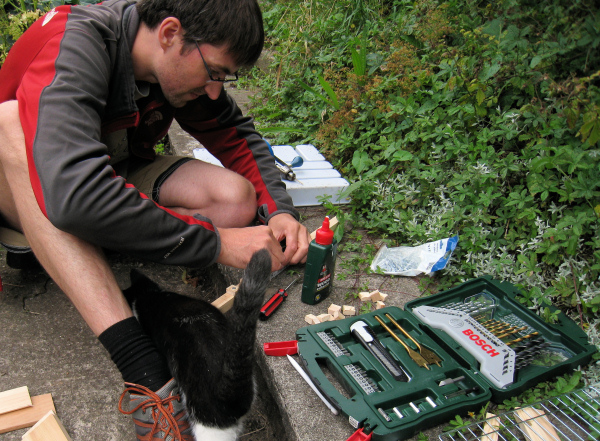
Cats

The cats were very helpful...

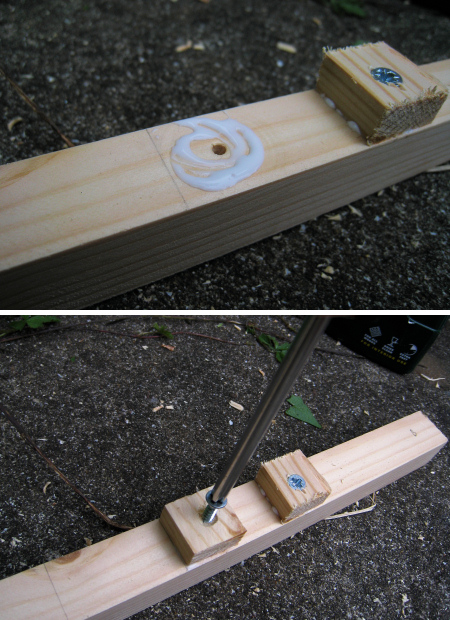
The basic idea is a simple wooden frame, with lights at the bottom to provide the heat and a fan to provide the air flow. All the joints were drilled, counter sunk, glued and screwed to produce a pretty robust frame.

Drilling

Drilling - no power tools used here!

Racks

Each corner post has little ledges for the racks to rest on.

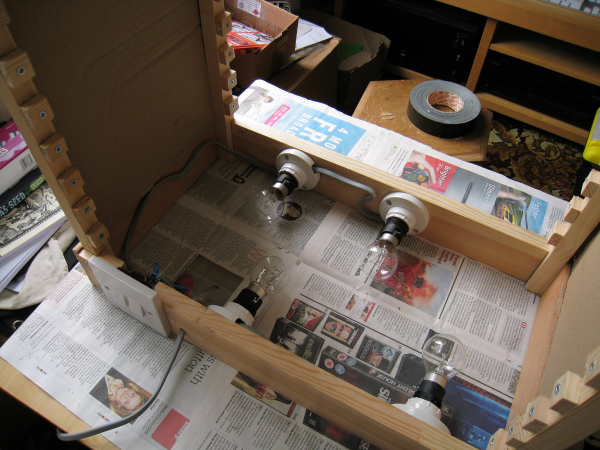
The four 60 W bulbs are in two parallel sets, each with its own switch. This gives us two heat levels of 240 W and 120 W.

Bulbs

Four 60 W bulbs provide 240 W of heat (and a small amount of waste light).

The sides are covered with thick cardboard. The 120 mm fan is fitted into the middle of the cardboard base, separating the bulbs from the heating area. It’s a DC fan, running off an old transformer I had kicking around.

Food dehydrator

All assembled with the 120 mm fan in the base.

And here we are in action!

Food dehydrator

First run!

In its current configuration the drying area is seven trays of 0.094 m2 totalling 0.66 m2. The capacity is 9 trays so a total of 0.85 m2, over twice the capacity of the cheapest commercial version. At least £10 of the final cost of £34 could be easily avoided by getting the wood and cable from a skip. The switch, bulb fittings, and plug could also probably be skipped with a little more effort. The trays were the most expensive part, they do look nice but similar function could have been achieved far cheaper by using a square metre of fine wire mesh from a garden centre. The apples do seem to be sticking to the metal a bit, so maybe plastic trays would work better? Or maybe we need to use a little bit of oil/butter on them next time.

Here’s the result:

Dried apple

The first batch!

It took around eight hours, used close to 2 kWh which is around £0.25 of electricity. Next up the solar adapter for sunny days! Whilst some did stick to the trays, these were the thinner ones; they were too thin! The best results are from the thicker slices, 4 mm seems around right.

The temperature with all four bulbs on was a stable 35 C, which looking at commercial dehydrators seems on the cool side. Be interesting to know how much airflow they have though. Now to try some courgettes! 🙂

Allotment Update No. 18

Follow the allotment series here.

Everything is growing really fast this month. After a relatively cool and wet July in Bristol (16.9C compared to the 30 year average of 18.3C along with 18% more rain) August seems to be a little warmer. Here’s the crop from the 13th August:

Harvest

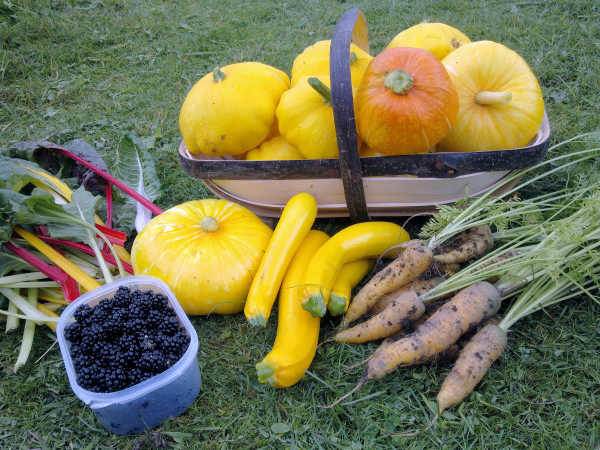
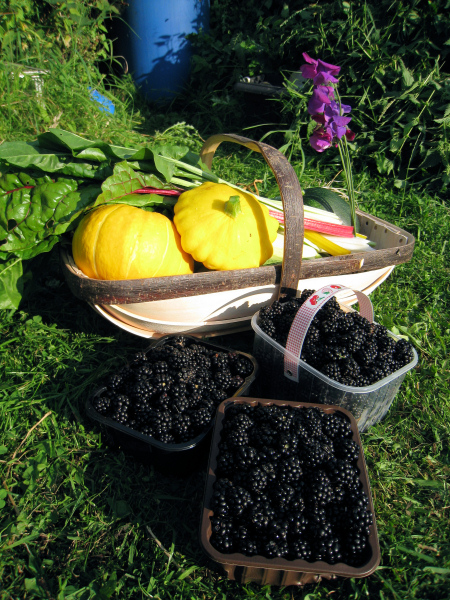
These are the first of our carrots along with lots of squash, courgettes, blackberries and chard.

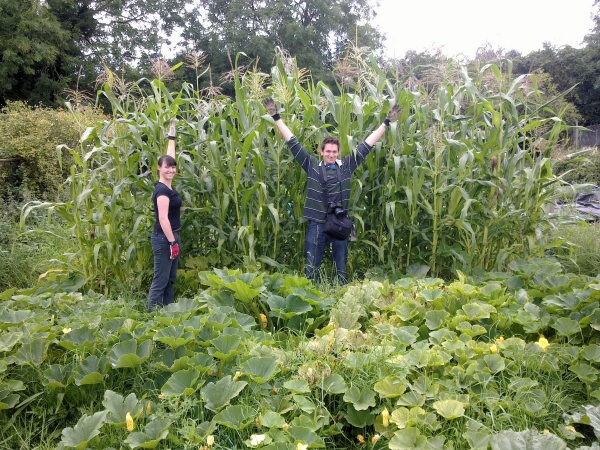
Of course we can’t hope to eat this much squash, though we’ve had a good go! Most of this load was given away at a BBQ last week. The variates here are Parador courgettes along with Sunburst, Sunshine and Turks Turban squash. We also have some Crown Prince, Harrier, Confection and Harlequin on the plot which should all keep fairly well, along with a prolific pumpkin. The carrots are Jaune Obtuse de Doubs’ Yellow Carrot, a non-hybrid from Real Seeds. These carrots were planted on 26th March. The squash plants are mostly growing in front of the sweetcorn:

Sweetcorn and Squash

Sweetcorn and Squash

Our monstrous sweetcorn! Dave’s a handy 6 foot rule so these 55 sweetcorn plants are around 9 foot. Looking at other allotment plots and commercial fields our corn is exceptionally tall, however, it seems to have fewer cobs forming than we’ve seen on other plants. The seed was another non-hybrid, called Golden Bantam Improved.

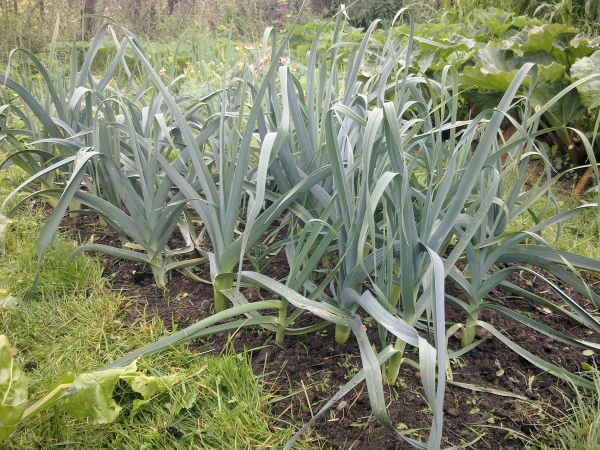
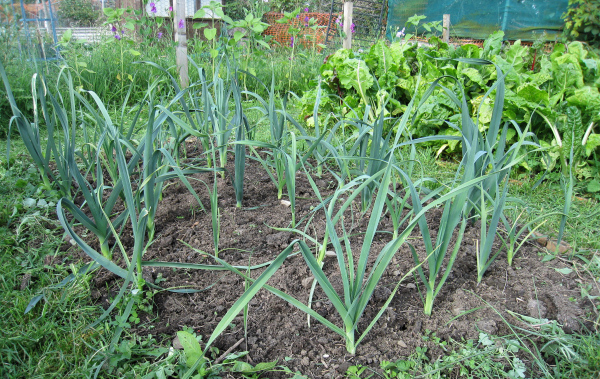
Leeks

The leeks are continuing to bulk up

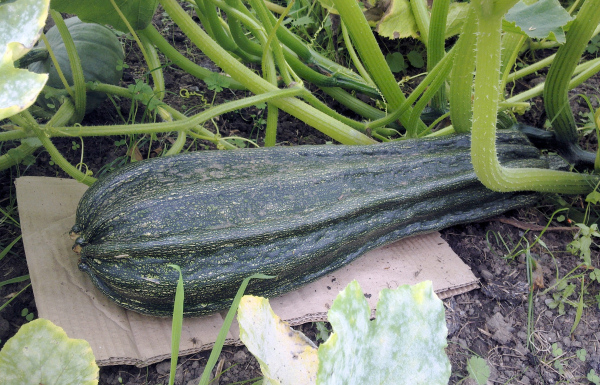
Marrow

We're letting this one grow!

This ‘marrow’ is actually a Romanesco courgette.

We sowed more carrots on 10th July. These should be ready by the end of October, thanks Amanda and Dave for weeding!

Carrots

Yellow carrots planted 10th July

Harvest

Here's our haul from 2nd August 2011

A few photos from earlier. This is the first half of the plot, as it looked on 17th July:

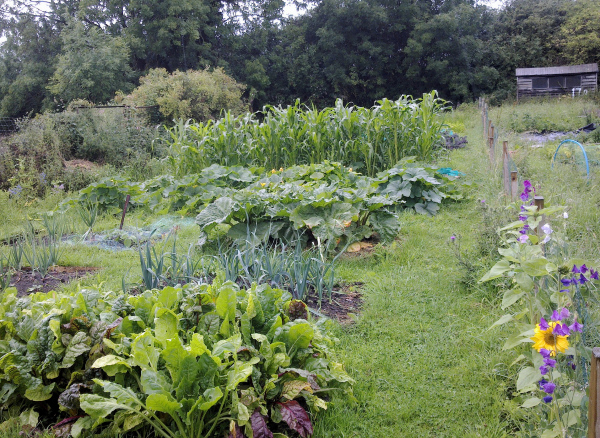
Allotment plot

Chard, leeks, rhubarb and squash in front of the sweetcorn

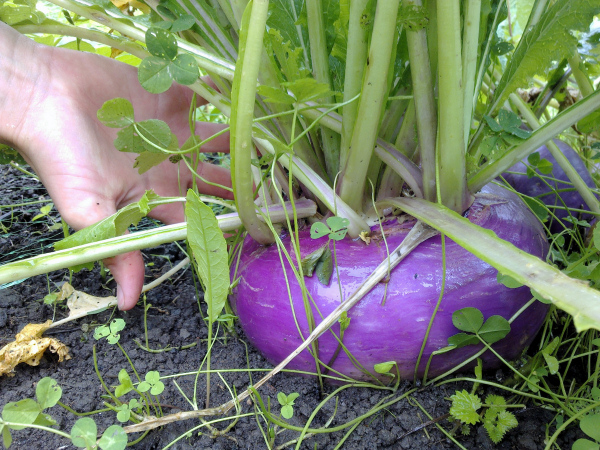
Turnip

We're eating the turnips much smaller than this... but it's fun to let one grow!

Kittens

The kittens are curious and enthusiastic creatures, not often helpful though!

Allotment Update No. 17

Follow the allotment series here.

A round up of recent progress on the allotment.

These photos are from 9th of July:

Leeks

These leeks had a slow start. The rabbits ate them almost down to the groud a couple of months ago. Amazingly they seem to have come back pretty well.

Squash

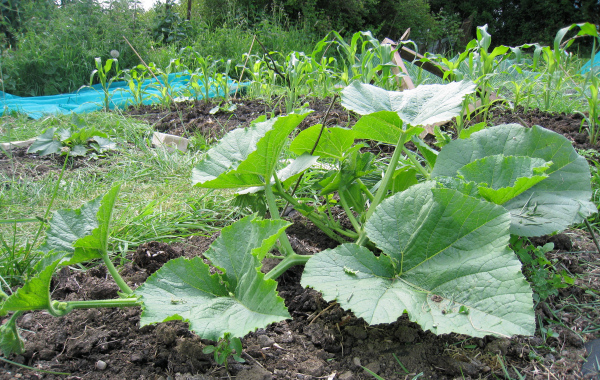
The squash are growing fast now, looks like we'll have a lot! These are called Sunburst and have a wonderful scalloped edge.

Kale

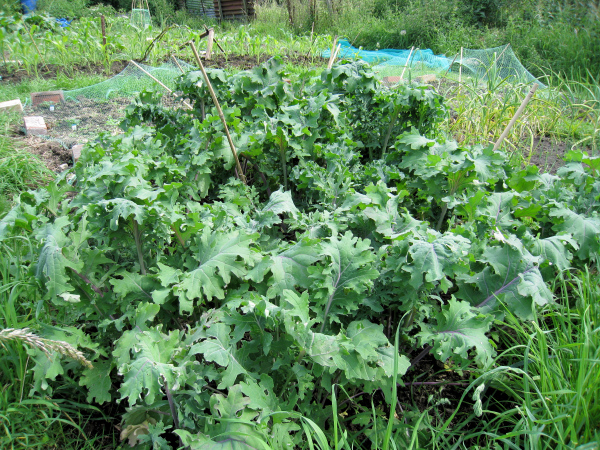
The kale's done really well. More than we can eat! And in the background the rapidlly growing sweetcorn.

A few days later, 23rd of July and we’ve got a good harvest:

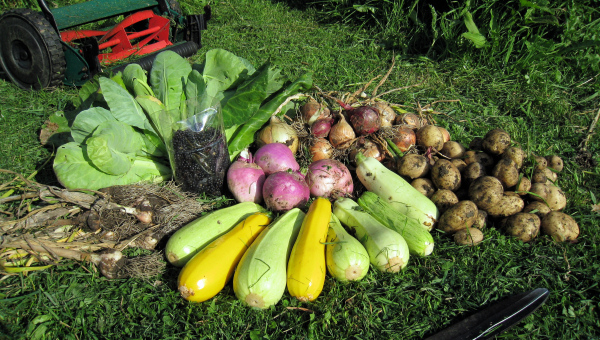
Harvest

The potatoes are the first earlies, Foremost. That's the crop from three plants. We've also lifted the second garlic patch, this was planted in January and seems pretty similar to the stuff that went in in November. Also a good crop of courgettes, turnips, chard, onions and blackberries.

Sweetcorn

Sweetcorn are looking lush now, lots of foliage but not much sign of corn yet!

Chard

The chard has been a great success. We have yellow, red and a more conventional leaf beat, very similar to spinach.

Sweetpeas

We've planted sweetpeas and sunflowers against the fence for a bit of colour.

Runner beans

The beans have been a nightmare, bad weather, rabbits and voles have had most of them. We have some dwarf runners that are finally doing what they're meant to do now.

Allotment Update No. 16

Follow the allotment series here.

After a record-breakingly dry spring, we’ve finally had some wet weather and the plants have really appreciated it. The rhubarb, which had been looking increasingly unhappy despite regular watering, is now thriving:

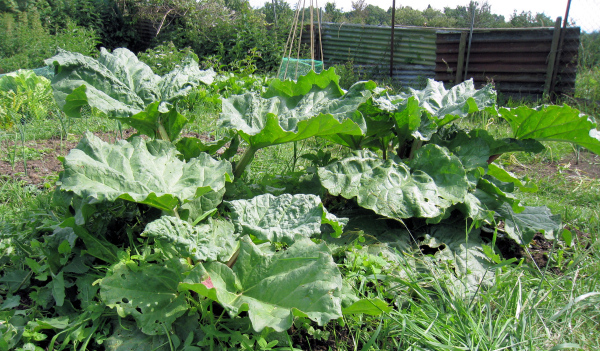
Rhubarb

Rhubarb, these started as four small donations from our allotment neighbour.

The remaining onions (some were nibbled by hungry rabbits) are starting to swell:

Onions

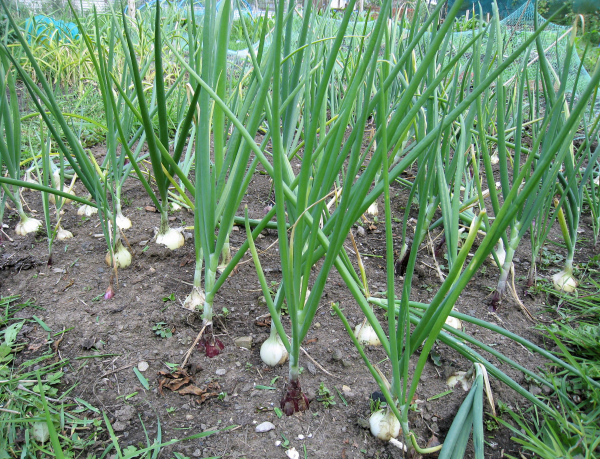
Onions, this is our 2nd bed of onions. They went in after the super cold December and have done better than the first lot.

And the sweetcorn are looking great!

Sweetcorn

Sweetcorn, current count is 55 plants from the 60 kernels. Not bad!

Our squash have come from various sources. Some we grew ourself from seeds, some we got as little plants, others from friends and family:

Pumpkin

Our largest squash, the donated pumpkin from Will & Kaz. 🙂

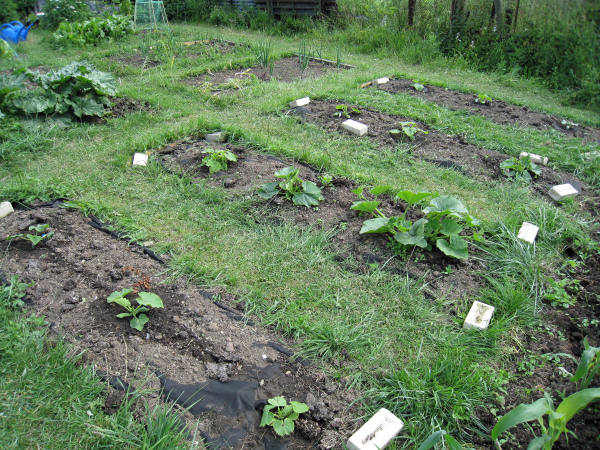
Squash

We have 23 various squash/pumpkin/courgette plants in total.

The beetroot and parsnips are coming along well. We may have underestimated the germination rate of the parsnips and overestimated our likely consumption of them…. Anyone out there who would like some parsnips in a couple of months’ time??

Beetroot

In the foreground, the eldest beetroot, behind them younger. In the background parsnips and potatoes.

After netting the chard to prevent the rabbits getting at it, it has grown up quickly. Tasting some directly from the plant, I can see why the rabbits liked it so much. The ordinary green ones taste best, but the yellow and red look exciting:

Chard

Rainbow (at least red, green and yellow anyway) chard.

Kale

The kale has been growing fast since it finally started raining a couple of weeks ago.

The garlic that we put in in autumn had completely died, so we were forced to harvest them all, although it’s a bit early. Maybe they were tricked by the dry spring into thinking that summer had been and gone. Turnips that we had almost given up on have also done remarkably well, so we thinned them out and ate some in white sauce with the chard.

Harvest

First real harvest this year. Chard, turnip and garlic.

Time to stop buying vegetables!

Live Below The Line

Last week we decided to join in with awareness raising campaign Live Below The Line. The main aim of the campaign (apart from fundraising) is to draw attention to the many people living below the “poverty line” (in the UK equivalent to £1 per day on food), and the challenge was to do the same, spending under £1 per day on food. Of course, it is not meant to be in any way comparable – someone “living below the line” for real would have a limited budget which would have to do for not only food but also toiletries, lighting, heating, cooking, accommodation, clothes, shoes, travel, medicine, etc. – but to be thought-provoking and challenging. We’re not the types who would normally spend £3 on a cup of coffee or eat out more than occasionally, but we certainly have the luxury of not needing to worry about the cost of food.

So, how did it go?

Well, we started badly by being away from home the week before and having a power cut on Sunday, so were rather distracted from our preparation which meant that we had to do our shopping on Monday morning, at Tesco. We have taken some flak for going to Tesco (more on that later) but we were unsure at that point whether we would manage the challenge, so prioritised quantity per penny and made full use of the Tesco Value range:

Shopping

Shopping

Total spent £8.90. The garlic (23p) and 1 onion (14p) were purchased separately and the homemade jam we worked out at 11p per 100g. We were pleased to have some money left over for oil and seasonings etc, which we priced pro rata, and we allowed ourselves produce from the allotment at a total of 37p for the week (£37 per year, 5% of area, 1/5 of annual produce – a debatable calculation but I think reasonable). Catch of the day was the celeriac, reduced to just 20p.

Monday breakfast: 90g oats and 18g jam, 7.5p

Then we made some bread (500g flour, 7g yeast and 5g salt, total 30p), of which we had a couple of slices each for lunch with 1/4 tin of tuna (11p) and a couple of biscuits (0.62p each):

Bread

Bread

Dinner (51p) included a sixth of a vegetable stew (1/2 celeriac, 500g carrots, 100g onion, 3 cloves garlic, 20g oil, 1/4 celery pack, 1 tin beans, 2 cartons passata, total £1.39), which we made on Monday and which provided Tuesday’s lunch and dinner as well. Rice portion 6p each. For dessert we had some rhubarb from the allotment. Also from the allotment was a delicious starter of asparagus, which was eaten before it could be photographed…

Monday

Monday

Tuesday breakfast: We had budgeted for 100g oats each per day for breakfast, but this did turn out a bit too much and we ended with some left over!

Lunch was leftovers for Chris (30p), and two tuna sandwiches for Erica (20p).

For dinner we started on the potatoes: we used 1.5kg (54p) for chips with a little oil (4p). Half of the chips were saved for tomorrow’s lunch and half served up with the remains of yesterday’s bean stew (45p) and 225g of the green beans (17.5p). Rhubarb followed. Divide that by two for the cost per person and here it is:

Tuesday

Tuesday

Wednesday lunch was chips and bean stew and a couple of jam sandwiches (30p) for Chris, which adequately fuelled his day of volunteering with a bicycle maintenance scheme. Erica finished the tin of tuna with the bread (and perhaps a couple of sneaky chips from the fridge) (20p).

Wednesday dinner was dal (500g yellow split peas, most of the rest of the garlic, 5g cumin seeds, 30g oil, <1g chilli, 1/2 onion, 1/2 celery pack, 2 carrots, total £1.21) with rice (6p each) and more green beans (12p). We started eating before remembering to take a picture: [caption id="attachment_808" align="aligncenter" width="600" caption="Wednesday"]Wednesday[/caption]

Thursday lunch and dinner were both more dal and rice, with green beans at dinner again:

Thursday

Thursday

On Friday morning we realised we had slightly miscalculated and should have cooked the previous night, so had to do it in the morning to avoid having to buy bread for lunch. We made another bean stew (135g onion, last of garlic, 25g oil, 1/4 celery pack, other 1/2 celeriac, other tin kidney beans, 3 carrots, 1 carton passata, total £1.06) and baked 11 potatoes. We each had 3 potatoes and some stew for lunch and Chris made some more bread (30p see above). Dinner was the rest of the stew and potatoes:

Friday

Friday

So we ended up staying just within the budget, but having a fair amount of food to spare. We didn’t use any of the plain flour (52p) or the tinned spaghetti (14p), and we had quite a lot of potatoes and carrots left over from the big packs, as well as some oats and green beans. In nutritional terms we did just fine on calories but probably were a bit over-reliant on carbs – and we also realised afterwards that there was almost no fat in anything we had except for the oil for frying, so it might have been sensible to use the slack for something like a bit of milk.

We were surprised to find the budget quite so easy to live on, and felt the main challenge was planning carefully. It was a bit strange to see some people posting on the LBTL Facebook page saying that they were going hungry or had only a carrot for dinner – I think these people relied a bit too much on over-processed “cheap” food which actually turns out not to be so cheap when you realise how little nutritional value it has. And those who insisted on having the non-negotiable meat and dairy products in their diet also seemed to trade off very heavily on calories, despite picking the most revolting sausages available(!) and the factory farmed eggs.

Returning to our own trade-offs, however…. as has been said above, yes we did go to Tesco and yes we did buy the non-organic exploited unethical veg while we were there. We thought this would be necessary but in retrospect we believe we were enough within budget that it would have been possible, but only just, to buy organic versions of some of these.

Whilst this has been an interesting exercise we feel an important point has been missed by many. The low price paid for food in the west (aka Tesco Value) is a form of exploitation and at least partly responsible for much of the world’s poverty. For example, the average U.S. consumer spent 9.8 percent of disposable personal income (income available after taxes) on all food in 2007, a figure that has fallen from 14% in the 1970s (ref). In the UK it’s around 15%, half what it was 50 years ago (ref). For those who are able, paying a fair price for food is part of ensuring that we can continue to support our farmers through the tough times ahead as agricultural inputs (based on fossil fuels) inevitably increase in price. Choosing organic and local, low-fuel-input foods is obviously an even better way of mitigating this problem by helping farmers move to more sustainable agricultural practices, securing a more affordable food supply in the long term. For our food future Tesco Value is part of the problem, not part of the solution.

Our next challenge will be to repeat the exercise, but restricting ourselves to organically grown and fairly traded produce. Fairly traded here doesn’t mean just “Fair Trade” branded but includes western countries with good labour laws. At the moment, these are often more expensive, so it will certainly be more of a challenge but one more relevant to the future.

We haven’t pestered anyone for donations, but if you’d like to help the charities who organised this campaign you can do so here.

Shopping Bill

Shopping Bill

Additions:

37p allotment produce (asparagus and rhubarb)
7p for 100g of sugar for stewing rhubarb
23p garlic
14p other onion
45p tin tuna
14p for 105g oil
0p for the last of some dried chilli from the garden from last year (<1g) 22p for 200g homemade jam 4p for 5g cumin seeds 11p for 14g yeast 0p for 10g salt ---- £1.78 Subtractions: 14p tin spaghetti unopened 52p plain flour unopened ---- 68p Total spent £9.99 (!) Leftovers (approx): 2kg potatoes, 800g carrots, 500g bread flour, 200g green beans, 150g oats, and a few biscuits! (about £1.50) making our actual daily average around 85 pence.